Monday, July 15, 2013

Inspiration and New Things

I've had a busy week over here, even if I don't have much to show for it as far as posts go. If you follow Oh Whimsical Me on Facebook, I'm sure you got the heads up that I have been dutifully working on some different designs, contemplating the direction I wanted to take a few things, as well as working through some real life stuffs. It has been a week full of inspiration digging and decluttering, with a bit of relaxation and fun squeezed in.

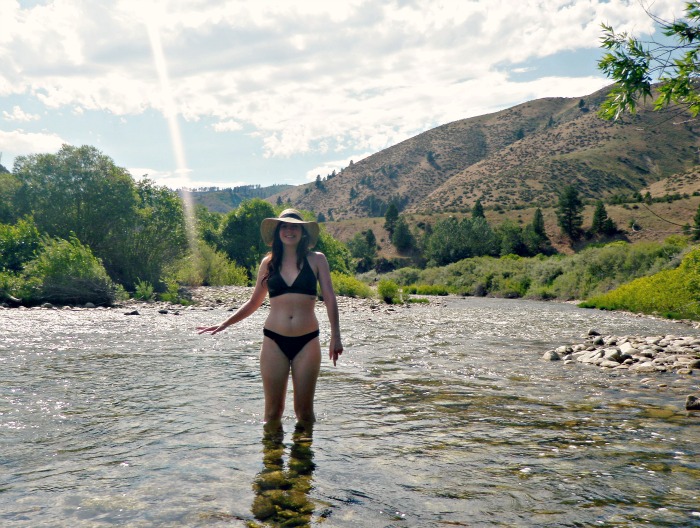
You may notice that things look a little different around here and I couldn't be more excited about it. I've worked hard on this new design. Although things aren't entirely in order yet, Blogger has been giving me quite a fit, I'm still happy to share it with you. You'll just have to excuse a bit of mitch-match for a few more days. Anyway, I thought'd it be fun to share with you a few images that inspired the new direction and design.

outfit / kitchen / plant


I'm always drawn to cool, muted colors. I think it is apparent in my wardrobe as well as my home decor. I want that to transfer over into this space as well, for I always want OWM to be a reflection of me and to feel nice and personal. You'll see that I actually didn't stray too far from the color palette I had before. I just updated it a bit. I wanted OWM to feel a bit more clean and crisp and fresh. I hope I accomplished that.

To help with the cleaner, crisper vision, I have also improved the way you can navigate this blog. If you're a regular visitor, you may have already noticed this update already, as I was testing it out last week. If you select a category from the sidebar, doing so will now take you to a page with links to all posts under that category. I love this improvement. You can now see all categorized posts easily, instead of searching through a tagged list of posts. Be sure to check it out (but keep in mind it is still in need of a few minor updates coming sometime this week)!

Also, be sure to like Oh Whimsical Me on Facebook so you never miss a post and for little extra updates and stories. I've got lots of things coming your way this week!

What's new with you? Did you miss me?

Tuesday, July 9, 2013

Feeling Confident: Revolt Check-In Week 10

Another quick update for you about how I am feeling with the Revolt Fitness program. Some exciting news, actually. I have reached my initial goals! Well, actually I reached them a few weeks ago, but I'm sharing now :) When I first set out on this journey with Revolt, I wanted some concrete and realistic fitness goals that I knew I could  achieve. You may remember that I started out at a body fat percentage of 26ish%. The goal I originally set was to get down to a body fat percentage of 20%. Well, I am there! Or I was a few weeks ago; I'll share my final measurements with you in two weeks.


So now that I have reached my initial goals, what does that mean for my progress and what do I do now? Well, I'm setting new goals. I am pushing myself to see improvement everyday in my workouts. I do still have things I want to lose; I'd like to see what's left of my love handles gone for good and I'd like to still lose a bit of fat from my thighs. But more than anything now there is a lot that I want to gain. I want to continue to grow stronger, to gain some more muscle mass, to tone up my arms and legs completely, to finally see these abs I've been working so hard on show through!

More than anything, I am so happy with the confidence I am gaining about my body. I hate how much shit we women give ourselves about appearance on a regular basis. No matter how aware I am of that fact, sometimes I still can't beat it. But, I am getting better! This weekend, when we were camping, was the first time in a long time that I was in a swimsuit in front of people (besides Will). And the first time in as long as I can remember that I felt comfortable as so. As silly as it may sound, it is empowering and freeing to not care how you look. And thankfully so, because it was so hot this weekend I think I was wearing my suit the whole time.

So I asked Will to take my picture in the river. And the pictures are silly and cheesy, but I love them. I had to include a blooper picture, because I know you all like laughing with me, and also because look! My swimsuit is even getting too big. My bottoms kept threatening to fall off. Haha.


I've had a bit of trouble keeping up with the workouts the past few days, with camping and other activities. I was sure to stay active, though. I am definitely ready and happy to get back into my routine.

I hope you're all enjoying the summer fun, confidently.

Disclaimer: I was chosen as a Revolt Fitness Program blogger and received free membership to try the fitness program. All results are real and my own. All opinions expressed are my own. 

Monday, July 8, 2013

Braided Crown 3 Ways: The Bohemian Wrap


It is here at last, part 3 of my first ever hair tutorial, a Braided Crown 3 Ways. I am calling it The Bohemian
Wrap. This look sure has quite a bit more personality and funk than the other two crowns I have shown you, which is why I love it. I've been an avid wearer of a forehead braid for quite some time; for as long as my hair has been long enough to allow it, actually. Up until recently I had only been braiding a forehead braid to just past my ear and wearing it with my hair down. Or around the back and into a side ponytail. I thought, why not take it a step further? I love the spin a forehead braid puts on a braided crown, so I had to share.


This may be the most difficult of the braids I have shown you. It is tricky to get the end of your braid to lay right. And it may be tricky for you to braid your bangs. It will be more difficult if you have bangs that are shorter than to your ears, but you can definitely still try (be prepared to be tucking lots of ends in with bobby pins)!


1. Begin by combing through your hair to remove any tangles. Run a tiny bit of coconut oil through your hair with your finger tips, if you'd like. Doing so will help with frizz and create a nice smooth braid. Create a very deep side part and comb your hair flat over to the opposite side.
2. Select three strands of hair about an inch back along the side part and begin french braiding towards your forehead.
3. Once the braid has reached your forehead, continue to french braid but only gather new hair from one side. Gather from the side towards the back of your head, creating nice loops on your forehead.
4. Continue in the fashion all the way across your forehead, sloping downward towards the opposite ear.
5. Bring the braid over the top of the ear a bit, and continue it toward the bottom back of your head.
6. Once the braid has reached the back of your head, begin a normal french braid again, gather hair from both sides as you braid.
7. Braid all along the back and then slowly braid up again, towards your other ear, until you have all of your hair in the braid. If your hair is not long enough to braid all the way around, consider ending the braid near your first ear and wearing it with your hair down or bringing it to the opposite side into a side ponytail or starting another braid on the opposite side and meeting them in the back of your head (covering up the ends with a bow or clip if needed).
8. Finish the braid and bring it back over the top of your head, being careful that the hair around the ear lays flat when you do so.
9. Meet the end of the braid with the beginning of it as best you can and pin in place.

Be sure to also check out part 1 and 2:
The Criss-Cross Applesauce
The Upside Down and Around


P.s. I'm sad looking at this pictures because I lost one of those little white square earrings when I was camping and I am a baby.

Sunday, July 7, 2013

Camping Along the Middle Fork


I'm back! I know you missed me. The past few days we've been on a little escape in the trees. Will and I were invited on a lovely camping trip by our dear friend Lindsey (who is a great planner, by the way) for the Fourth. We drove up a little early Thursday morning to find a nice spot for everyone along the Middle Fork of the Boise river, up past Arrowrock Dam. Will and I arrived well before the rest of the group and headed straight for the river with our chairs and some beers while we waited for everyone to arrive.


The first day Will and I spent exploring and relaxing in the water while people slowly arrived. My lovely friend Christina made a yummy curry that night for dinner for everyone with fresh vegetables from her garden, and Will and I brought some sockeye salmon (with a brown sugar, soy sauce glaze and sweet onion) to share and we all dined like kings. I sadly retreated to bed early the first night, as I was feeling quite a bit sun sick (I told you I don't handle heat well; heat stroke is zero fun.) and was tired from a long day. Friday Will and I got up early, having gone to bed early the night before, and had some delicious bagels with salmon cream cheese, hard boiled eggs, and grapefruit for breakfast. Don't you just love that I'm telling you about our camping trip and the thing I am most excited about was the food? I just love food, okay? As per usual.


I felt like Will and I were the weird hippie old couple of the group, going to bed early and waking with the sun, with all the knowledge of the forest. Haha. Will agreed with me. I love my friends, and their amazement at using a hatchet for a spatula. I chose to stay behind while the rest of the group went swimming down at the reservoir during the day Friday. I knew if I went I would have blazed completely in the sun; it was a little easier to control my sun exposure in the river. Plus, I just enjoy the scenery of the river quite a bit more. Christina and Isaac stayed behind with us as well, and spent the day sipping on gin and juice in a little pool along the side of the river. We also spent some time wading through the river, fording the river, and exploring the surrounding area. Christina classified some plants for us and Will attempted to spot out some fish. We did see some little tadpoles, though! We split some peanut soup that I made ahead of time for lunch and took an afternoon nap before the rest of the group got back. The rest of the night was spent around the fire, chatting and drinking good wine. And I only had one anxiety attack the entire trip (sorry guys)!


It was terribly hot (but you know how I feel about that) but all in all it was a great time spent meeting some wonderful new friends, and getting to know old ones better.

Tent City, you will be well remembered.

Wednesday, July 3, 2013

Sweet Potato Ranch Thin-Crust Pizza


Sometimes great things just happen to me completely unexpected, you know? This pizza was one of them. I think the reason it was so great was I was about like 5 minutes away from eating crackers in some form for dinner. Because I hadn't been to the grocery store in some time but was way too hungry to go there now. Does that ever happen to you? This was on Saturday, my "cheat" day, and I had been craving pizza like a mad woman (as per usual). So finally I just decided I would find what ever vegetables we had left in the refrigerator and make my self one. Because I will do anything for pizza.

Now that you have the back story, this pizza turned out way better than expected. I used ranch for the sauce, because hey, why not? (also because there was nothing else) and topped it with a combination of sweet potato, spinach, and red onion. I, of course, realized as soon as I was pulling this out of the oven that I had a can of artichokes hearts. I was pretty upset about not discovering that earlier, so if you have them include them. Because artichokes make literally everything better.

As always, I recommend sipping on some red wine will you prepare this.


Sweet Potato Ranch Pizza, makes one large thin crust pizza

Pizza Dough, I always use this recipe

1/2 a red onion, thinly sliced
1/2 a sweet potato, thinly sliced
1 cup fresh spinach leaves
4 oz fresh mozzarella cheese, sliced
1/4 cup feta cheese crumbles
1/4 to 1/2 a cup ranch dressing (I used Newman's Own)
dried basil and oregano, to taste


Begin by making your pizza dough (feel free to use my recipe), kneading it and then rolling it out to the size of your pizza pan or stone. Let it sit while you cut up all the vegetables you will be topping the pizza with. I heated up the sweet potato in the microwave for about 4 minutes first, to get it a bit tender. Then, using a spatula apply a thin even coat of ranch dressing to your crust, using about 1/4-1/2 a cup depending on how large your pizza ends up being. Then layer the veggies on. Finish by topping with fresh mozzarella, feta crumbles and sprinkle with basil and oregano. Bake for 20-25 minutes at 350 degrees. I always cook mine for 20 minutes and then turn the broiler on high and let it get all crisp and bubbly for another minute or two.


Slice up into pieces of desired size and serve with some balsamic vinegar for dipping. Or smother it in more ranch like Will did. To each their own.

Enjoy!

Tuesday, July 2, 2013

Braided Crown 3 Ways: The Upside Down and Around


Here you have it, lovelies, part 2 of my first ever hair tutorial, a Braided Crown 3 Ways. I like calling this one The Upside Down and Around, because of the way you have to comb all your hair forward and hang upside down for a bit to achieve it. This is a more traditional way of achieving the gorgeous braided crown style than The Criss-Cross Applesauce and also a step or two up in difficulty. But don't let that discourage you, practice it a few times, and I'm sure you can get it down. At first I had difficulty getting the braid to lay right when I brought it around front to the top of my head and had to do it a few times every time to get it looking right. I can now get it in one go! Marvelous.


In my opinion, The Upside Down and Around is not quite as playful as The Criss-Cross Applesauce. Rather, I think the style of this one is super elegant and classy. But still the kind of classy you can pair with jeans and a t-shirt if you fancy. Try giving it a go!


1. Begin by combing any tangles out of your hair and then comb it all completely forward.
2. Select three strands of hair from the bottom center, near your neck.
3. Using these three strands, begin braiding a french braid in an inside out fashion. To do this, when you go to cross the strands of hair, bring the strand under the previous one instead of over, collecting more hair with each strand also. Braid upwards at an angle, sort of towards your ear. This is where I had trouble for the longest time. You do not want to braid straight upwards to the top of your head, rather bring it around the side a bit. Think of a halo or a crown sitting on your head and creating that roundness.
4. Once the braid has reached the top of your head, flip right side up again. Continue braiding in the inside out style, gathering the hair from the top of your head, including your bangs if you've got 'em (you can totally leave them out, if you want, don't let me tell you what to do).
5. Braid all the way across you head, eventually bringing the braid back down and back a bit. Gather any remaining hair from the nape of you neck, if any, and finish the braid.
6. Take the end of your braid and loop it around the back of your head following the pattern already there from the start of the braid. You will pin it back into itself.
7. Using a generous amount of bobby pins, secure the end of the braid in place, as well as flattening any bumps and tightening flyways. If your hair is not long enough for the end of your braid to reach all the way back around, you can secure the end into a bun, or hide the end of the braid with a cute lace bow.
8. Once pinned in place, loosen some of the loops of your braid up a bit, for a more romantic look.

There you have it. Have you worn your hair this way before?

Don't forget:
- you can see The Criss-Cross Applesauce here
- and The Bohemian Wrap is now here

Monday, July 1, 2013

Look Whose Belly is Disappearing: Revolt Check-In Week 9

I had a lovely, empowering week with Revolt. I'm really excited because I've finally started to loose fat from the places I've been wanting to the most. It is a shame you can't target fat loss, I could of done without loosing some of my boob size. Now, I don't mind that too much, but I would have rather lost the fat from my thighs. Up until this point, I've been loosing body fat from my upper body just fine, I've seen my chest and waist and belly shrink significantly. Now I am finally seeing some of that fat I have always had, around my thighs and 'love handles' slowly diminish. So exciting! But not as exciting as rocking every one of my workouts lately! As I've explained before, all Revolt exercises are broken down to 3 levels, from beginner to advanced, so no matter where you are on your fitness journey you can find what works for you in each exercise. I started out as a 2, the intermediate level, and as I've gotten stronger I've floated between a level 2 or 3 switching up or down depending on the exercise. I am proud to say that this is the first week were I managed to complete all exercise at the highest level! Even upper body. And it felt great. And I wanted more! So I added in some fun dynamic (read really hard, super sweaty) yoga and a few extra cardio circuits. I was in exercise bliss.

That was until Saturday, when I embarrassed myself hiking and totally biffed it down a slippery, rocky hill. I managed to scrape my left leg pretty bad, as well as my hands. But the cuts and scraps and blood didn't bother me; what did is that I also managed to bruise up my knee really well and hurt my wrist too. My leg is still in pretty bad shape, I may have pulled something in my calf because it is either fine or hurts like a motherfrakker, depending on which way my foot is pointed when I go to lift my leg. And my knee was already in bad shape from landing weird on it on a camping trip awhile ago. I think my wrist will be back to normal in a few days, it just feels a little stiff and bruised.

So, as you may have guessed, I'll have to take it easy here for the next few days. Which I know is necessary, but I am still pretty bummed about. We are starting a new Uprising today, which means a whole new month's guide, brand new exercises, and a yummy new menu. It also means no more Tabatas! We're returning back to giant cardio circuits, which I am excited to try out again at a higher level. I am most excited that my suggestion of cauliflower crust pizza made it on the menu, though! Healthy pizza all week!? Yes please.

As promised, I've included more progress pictures. I have to apologize that the lighting is so bad in the last two of these. I'm just glowing yellow a bit. But in the front view, can you tell that my thighs are finally changing a bit? And that from-the-side picture, where did the belly go!?


Well, wish me a quick recovering so I can start July strong! Hope you are all feeling lovely today and I hope it is not as deathly hot as here, where ever you are :)

Disclaimer: I was chosen as a Revolt Fitness Program blogger and received free membership to try the fitness program. All results are real and my own. All opinions expressed are my own.